Three Small Experiments to Learn Seasonal Fruit Preserves
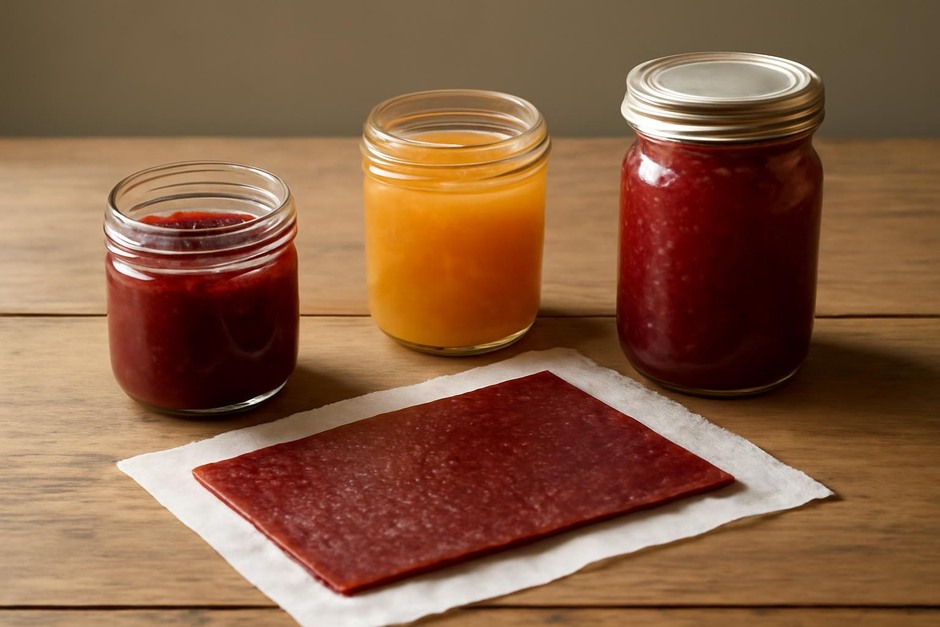
Late summer and early autumn bring small, repeatable chances to practice a useful kitchen skill: turning ripe fruit into shelf-ready flavors that brighten breakfasts and snacks. Rather than one long recipe, try a sequence of three short experiments. Each is manageable in under an hour or two, uses minimal equipment, and teaches a particular aspect of preserving fruit: flavor concentration, texture control, and drying. Treat them like small lab tests—note what you see, taste, and prefer.
Experiment 1 — Small-Batch Stovetop Jam: Watch Fruit Become Spread
What you learn: how heat breaks down fruit, how sugar amplifies flavor, and how viscosity develops.
Ingredients and kit (for a tiny test batch):
- About 300–400 g fresh fruit (berries, chopped stone fruit, or diced apples)
- 100 g granulated sugar (adjust to taste)
- Juice of 1/2 lemon
- Small saucepan, wooden spoon, small heatproof jar, and a plate for testing set-up
Method:
- Crush or chop the fruit into even pieces. Combine fruit, sugar, and lemon juice in the saucepan.
- Warm gently until the sugar dissolves, then bring to a gentle boil. Stir frequently to prevent sticking.
- After 6–12 minutes, test a spoonful on a chilled plate: if it thickens and wrinkles when pushed with a finger, it’s jammy; if not, cook a little longer.
- Transfer warm jam to a clean jar and cool. Store in the refrigerator and use within a couple of weeks.
Notes to record: how the fruit looked at start and end; whether you preferred a chunkier or smoother result; how much cooking time was needed for the set you like.
Experiment 2 — No‑Cook Freezer Jam: Preserve Bright Fruit and Texture
What you learn: how pectin (or simply sugar and fruit structure) can set a preserve without heat, and how cold storage preserves fresh color and flavor.
Ingredients and kit:
- About 400 g very ripe but firm berries or chopped soft fruit
- Sugar or a prepared powdered pectin for no-cook jams (follow product amounts if using pectin)
- Mixing bowl, potato masher, sterilized jars for the freezer
Method:
- Mash the fruit to the texture you like. For smoother jam, use a blender briefly.
- Stir in sugar (and pectin if using), taste and adjust. Let sit a few minutes to draw out juices.
- Fill jars, seal, and place in the freezer. Defrost in the fridge when needed; keep leftovers cold.
What to compare: the brightness of flavor vs. stovetop jam, texture differences, and how long the set lasts after thawing. Freezer jam is a forgiving, quick route to learn about balance without the worry of overcooking.
Experiment 3 — Fruit Leather: Concentration, Sweetness, and Texture by Drying
What you learn: how dehydration concentrates flavor, how sugars and acids change mouthfeel, and how to use excess or imperfect fruit.
Ingredients and kit:
- About 500 g fruit (use leftovers, an overripe mix, or the rest of your batch)
- Optional: a small spoon of honey or sugar to taste; a dash of lemon juice
- Dehydrator or oven set low (about 60–70°C / 140–160°F), rimmed baking sheet, silicone mat or parchment
Method:
- Puree the fruit until smooth. Taste and adjust sweetness or acidity.
- Spread a thin, even layer on the mat to about 3–5 mm thickness.
- Dry until the surface is tacky but not wet and the leather peels away cleanly (several hours, depending on thickness and temperature).
- Cool, cut into strips, and roll in parchment for storage. Store in a cool, dark place for a few weeks or refrigerate for longer.
Observation points: how concentrated the flavors become, which fruits make the best texture, and whether adding a little lemon juice brightens otherwise cloying purees.
Finishing Notes and Next Steps
After these three experiments you’ll have tasted the same fruit transformed three ways: cooked and thickened, preserved fresh in the freezer, and concentrated by drying. Keep a small notebook or photos for each trial—record fruit variety, sweetness, texture, and storage results. From here you can choose a direction: repeat a favorite with a larger batch, explore low-sugar options, or learn shelf‑stable canning methods when you’re comfortable with set, acidity, and sanitation.
These experiments are designed to be low-risk, hands-on learning: start small, make notes, and treat each jar or sheet as a lesson. Seasonal fruit becomes an ongoing teacher—each harvest gives a new chance to refine timing, balance, and technique.
Tip: label jars and bags with the date and a short note on sweetness or texture preference; your future self will thank you.